Laying laminate flooring
Laying laminate flooring yourself has never been easier, thanks to Pergo’s innovative PerfectFold™ and Uniclic® click systems. Think of it like assembling a perfectly fitting puzzle. With just a few clicks, you can refresh an uninspiring space, whether it's a cozy bedroom or a sleek kitchen with the timeless look of our laminate floors. Best of all, laying laminate flooring doesn’t require hiring a craftsman. Simply follow the step-by-step instructions, and you’ll have a professional-quality floor in no time.
When the laminate floor moves in
Even if it is easy to lay flooring, there is naturally a bit to keep track of. Some instructions may seem obvious, while others are things that the first-time floor-layer might not have thought of. Like the flooring needing to become acclimated for two days before you lay it, for instance.
Laminate flooring mainly consists of natural wood that expands and shrinks a bit with the humidity. If you lay the floor before it has had time to get acclimated, there is a risk that it expands after you have laid it - it is most often warmer at home than in the store - which simply makes it too tight for the floor boards.
This is why you should always let your laminate flooring rest in the room – in its packaging – for at least 48 hours before you begin laying the floor.
For laminate flooring in particular, it is a matter of small differences between humid and dry, but a few millimetres of space between floor and wall are nonetheless important. Then you can feel certain in both wet and dry. Use a distance block in the installation kit.

STEP 1: Prepare your subfloor
The quality of your subfloor has a big influence on the final installation result. Remove any existing floor covering first. After checking the subfloor for unevenness, carefully vacuum the entire surface. Make sure that the floor base is flat, clean, firm, and dry. To avoid risk of squeaking, secure any loose parts.
How big can the joints in your existing tile floor be? How can you level out irregularities? What about underfloor heating? Be sure to read the installation instructions upfront to be fully prepared.
STEP 2: Choose your underlay
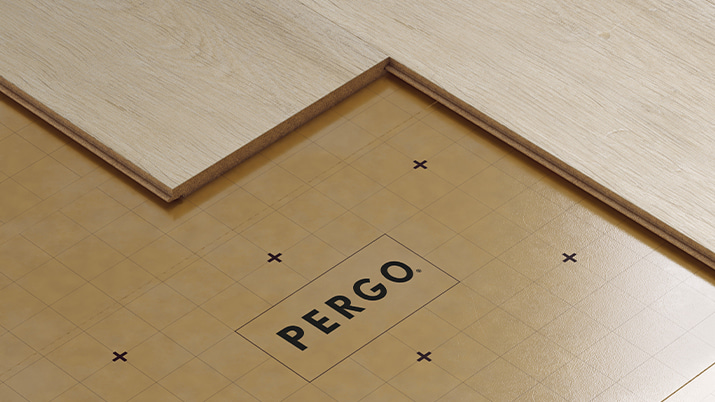
We advise to always use a Pergo underlay. They are specially designed to offer excellent sound reduction, thermal resistance and levelling. The choice of a Pergo underlay will make sure the installation goes much smoother.

STEP 3: Collect your tools
Thanks to the convenient click system, you don’t need a whole assortment of tools. We do advise to use only Pergo accessories as these have been especially designed and tested for the use with our Pergo floors:
- Hammer
- Saw
- Pencil
- Tape measure
- Safety goggles and gloves
- Pergo installation set
STEP 4: Install an underlay for your laminate floor
Unroll your Pergo underlay and lay it as close as possible to your wall. Install the first row in the same direction as you plan to lay your laminate floor. Gradually add rows of underlay as you progress. Use our Pergo adhesive tape to connect the underlay strips and avoid overlapping them. Seal all joints and make sure you don’t leave any gaps (except when you have a wooden subfloor).
STEP 5: Lay your laminate floor
- First, check how many full rows of planks you will need by dividing the width of the room by the width of a plank.
- Make a mark on the wall where you’ll be laying your last full plank. The last plank should be at least 5 cm wide for easy installation.
- Make sure the panels are mixed sufficiently when you install them, so that you do not end up with too many identical, light or dark panels next to each other.
- Start with the first plank you will install in the corner of the room. Remove the click profile on both the long and the short side of the plank by sawing it off. Any side of a plank that is directly next to a wall, must have its click profile removed, in order to ensure the required expansion gap.
- Ensure that the end joints of the panels in two successive rows are never in line. Make sure that the joints are staggered by at least 30 cm.
- Click the first plank of the second row into the first plank of the first row and keep going like that. The easiest way to work is to sit on the already installed planks.
- Pergo laminate is not intended for "glued-down" installation.
STEP 6: Saw your laminate floor
Inevitably, you will have to cut a few laminate planks to make sure they fit your space perfectly. Depending on the type of saw, position your plank with the decor side face-up or face-down. Don’t forget to wear gloves and use a pencil to draw your cutting lines!
STEP 7: Finish in style and keep it waterproof
To finish off your flooring project, you can install matching skirtings, finishing profiles, or other fine details like Pipe covers.
Want a watertight finish?
- Use the Foamstrip to fill up expansion gaps between the wall and floor
- Apply Pergo Aqua Sealant for watertight finishing
- Add a transparent hydrostrip to your skirting


